Hello there!
Im so busy trying to draft and create baby boots and a shoe pattern ( coming up) and get my stock up, that i thought it might be time to post something to shorten the long wait ( i know, way too long) until the opening of my shop.
Last year and this year everybody went crazy about all kind of woodland animals. You know foxes, bears and especially OWLS! So last year i drafted a little pattern and made a few of those plush owls for my son or as presents for other kiddos.
They are cute to hang on the crib or pram or just for snuggles.
I thought it might be a good idea to make a step by step photo tutorial as this is one of the easiest patterns and really doable for sewing beginners.
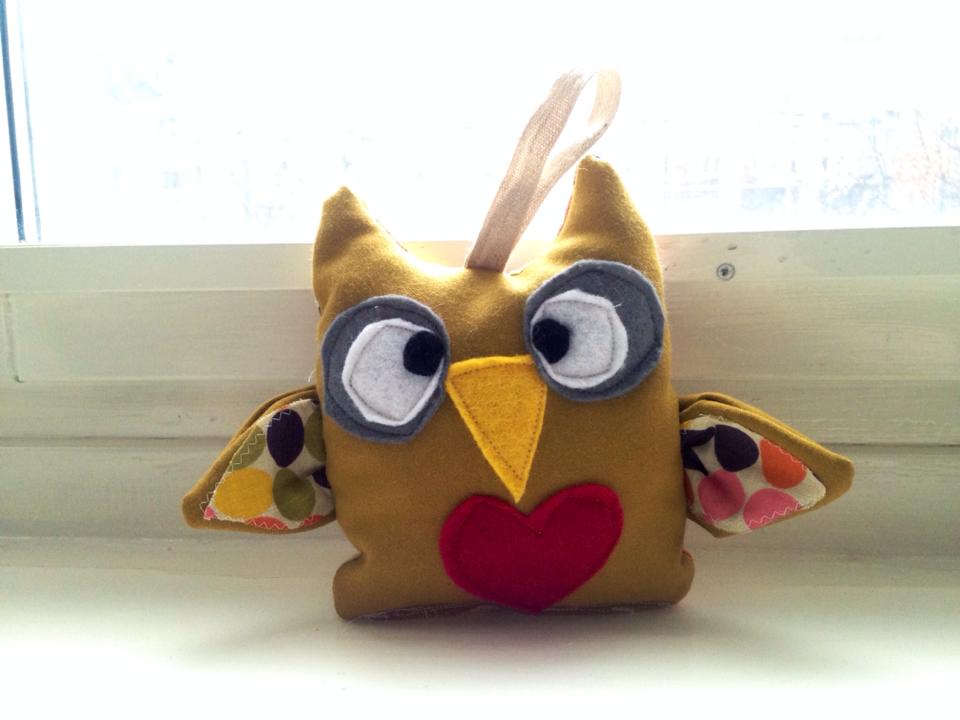
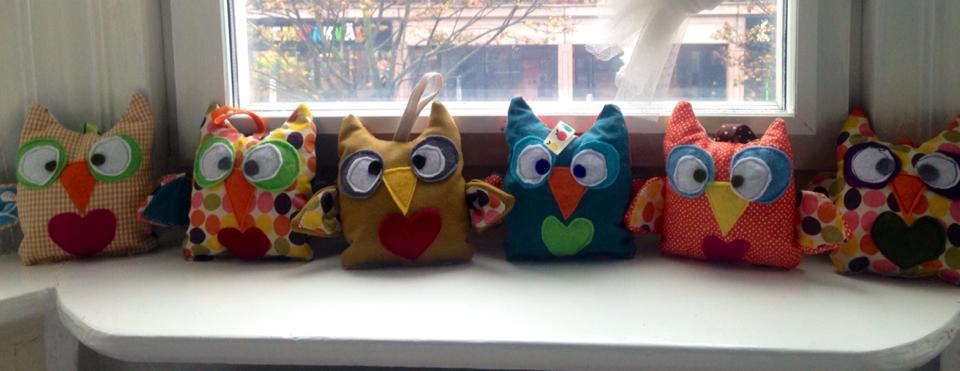
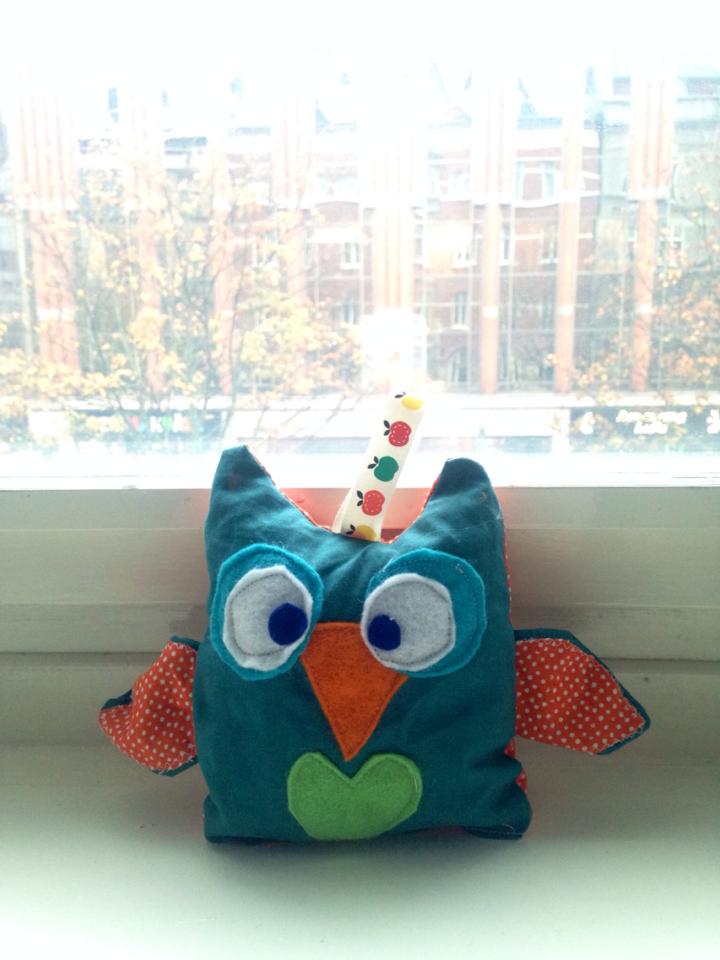
Here are some examples of my little owl friends.. You can go crazy and mix and match all kind of patterns and colours.Fabric wise i mostly used a cotton/ canvas for the body and felt for the face. Aren’t they loveable?
If you love them but you don’t have the time, muse or skills (almost non required seriously) then you are very welcome to purchase some of those over the upcoming online shop!
Ok . Tutorial.
You need:
– contrasting or matching fabric. Use any kind of cotton or canvas. (if you use a heavy canvas please use a denim needle when sewing front and back together)
– felt
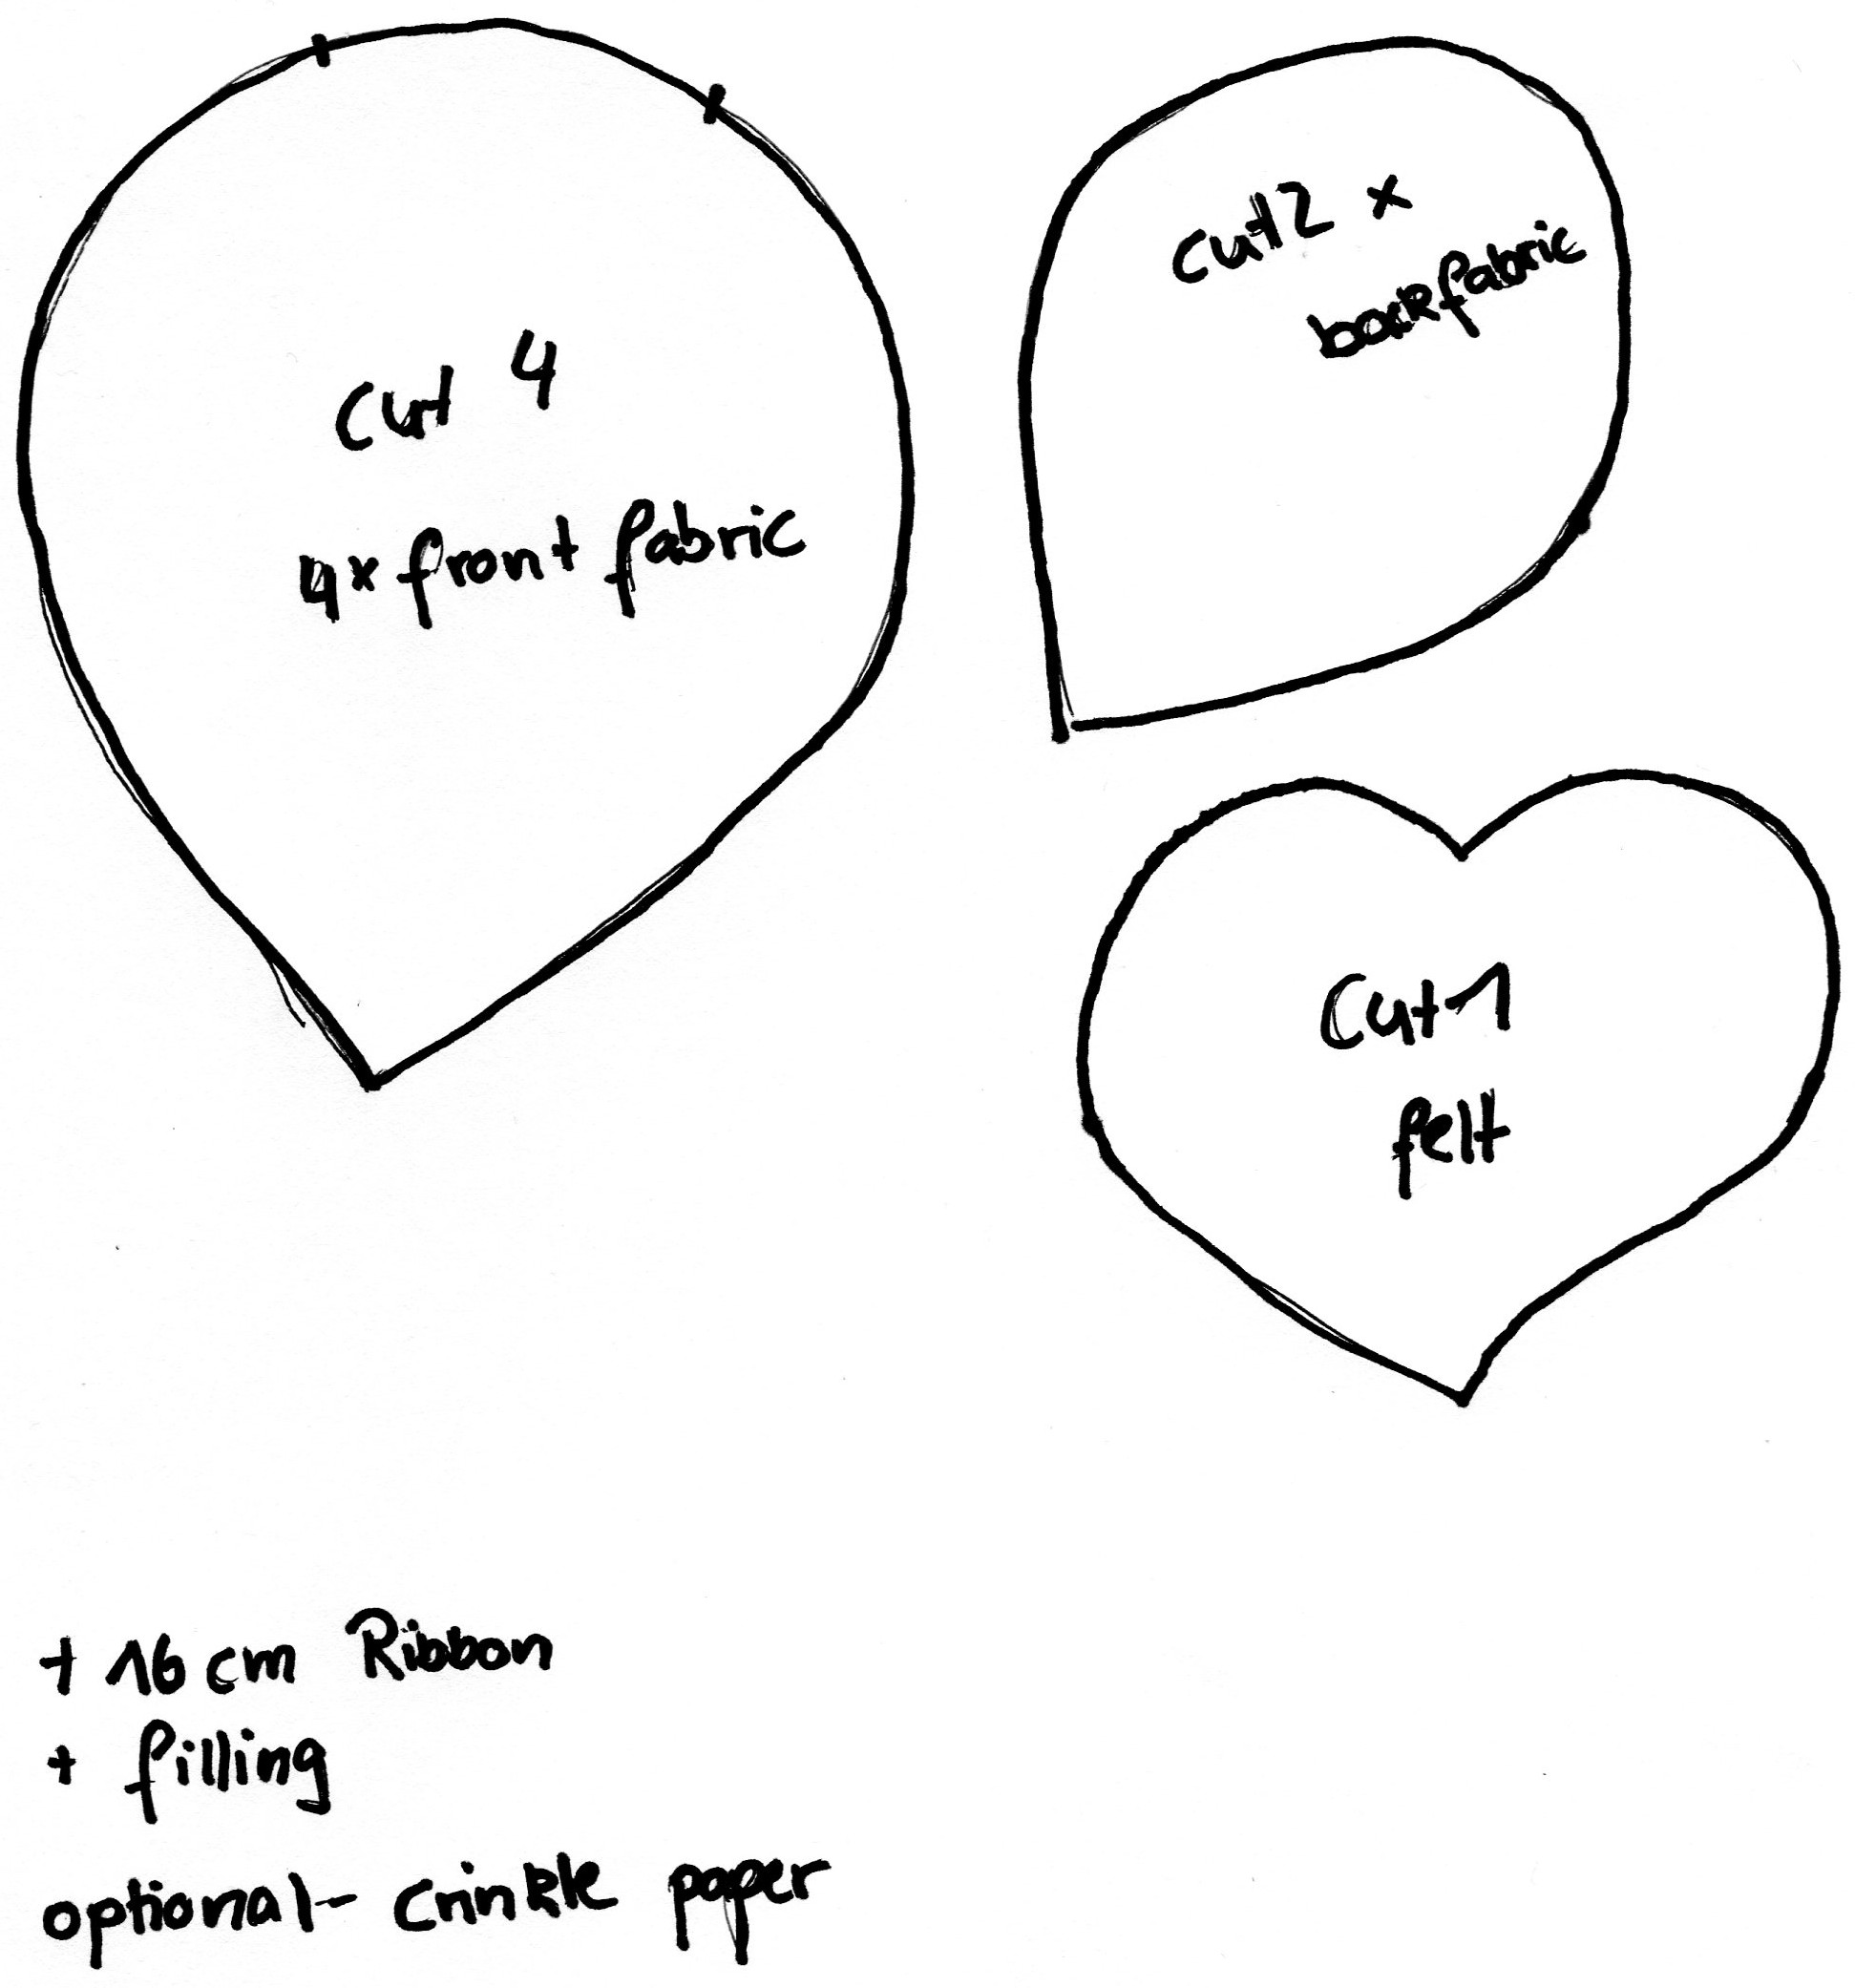
– 16cm of ribbon
– filling (i use either polyester filling from the craft store OR ikea pillow filling-cheap!)
optional: fabric glue, crinkle paper ( look through your pantry, any kind of candy wrapper, chips bags… work)
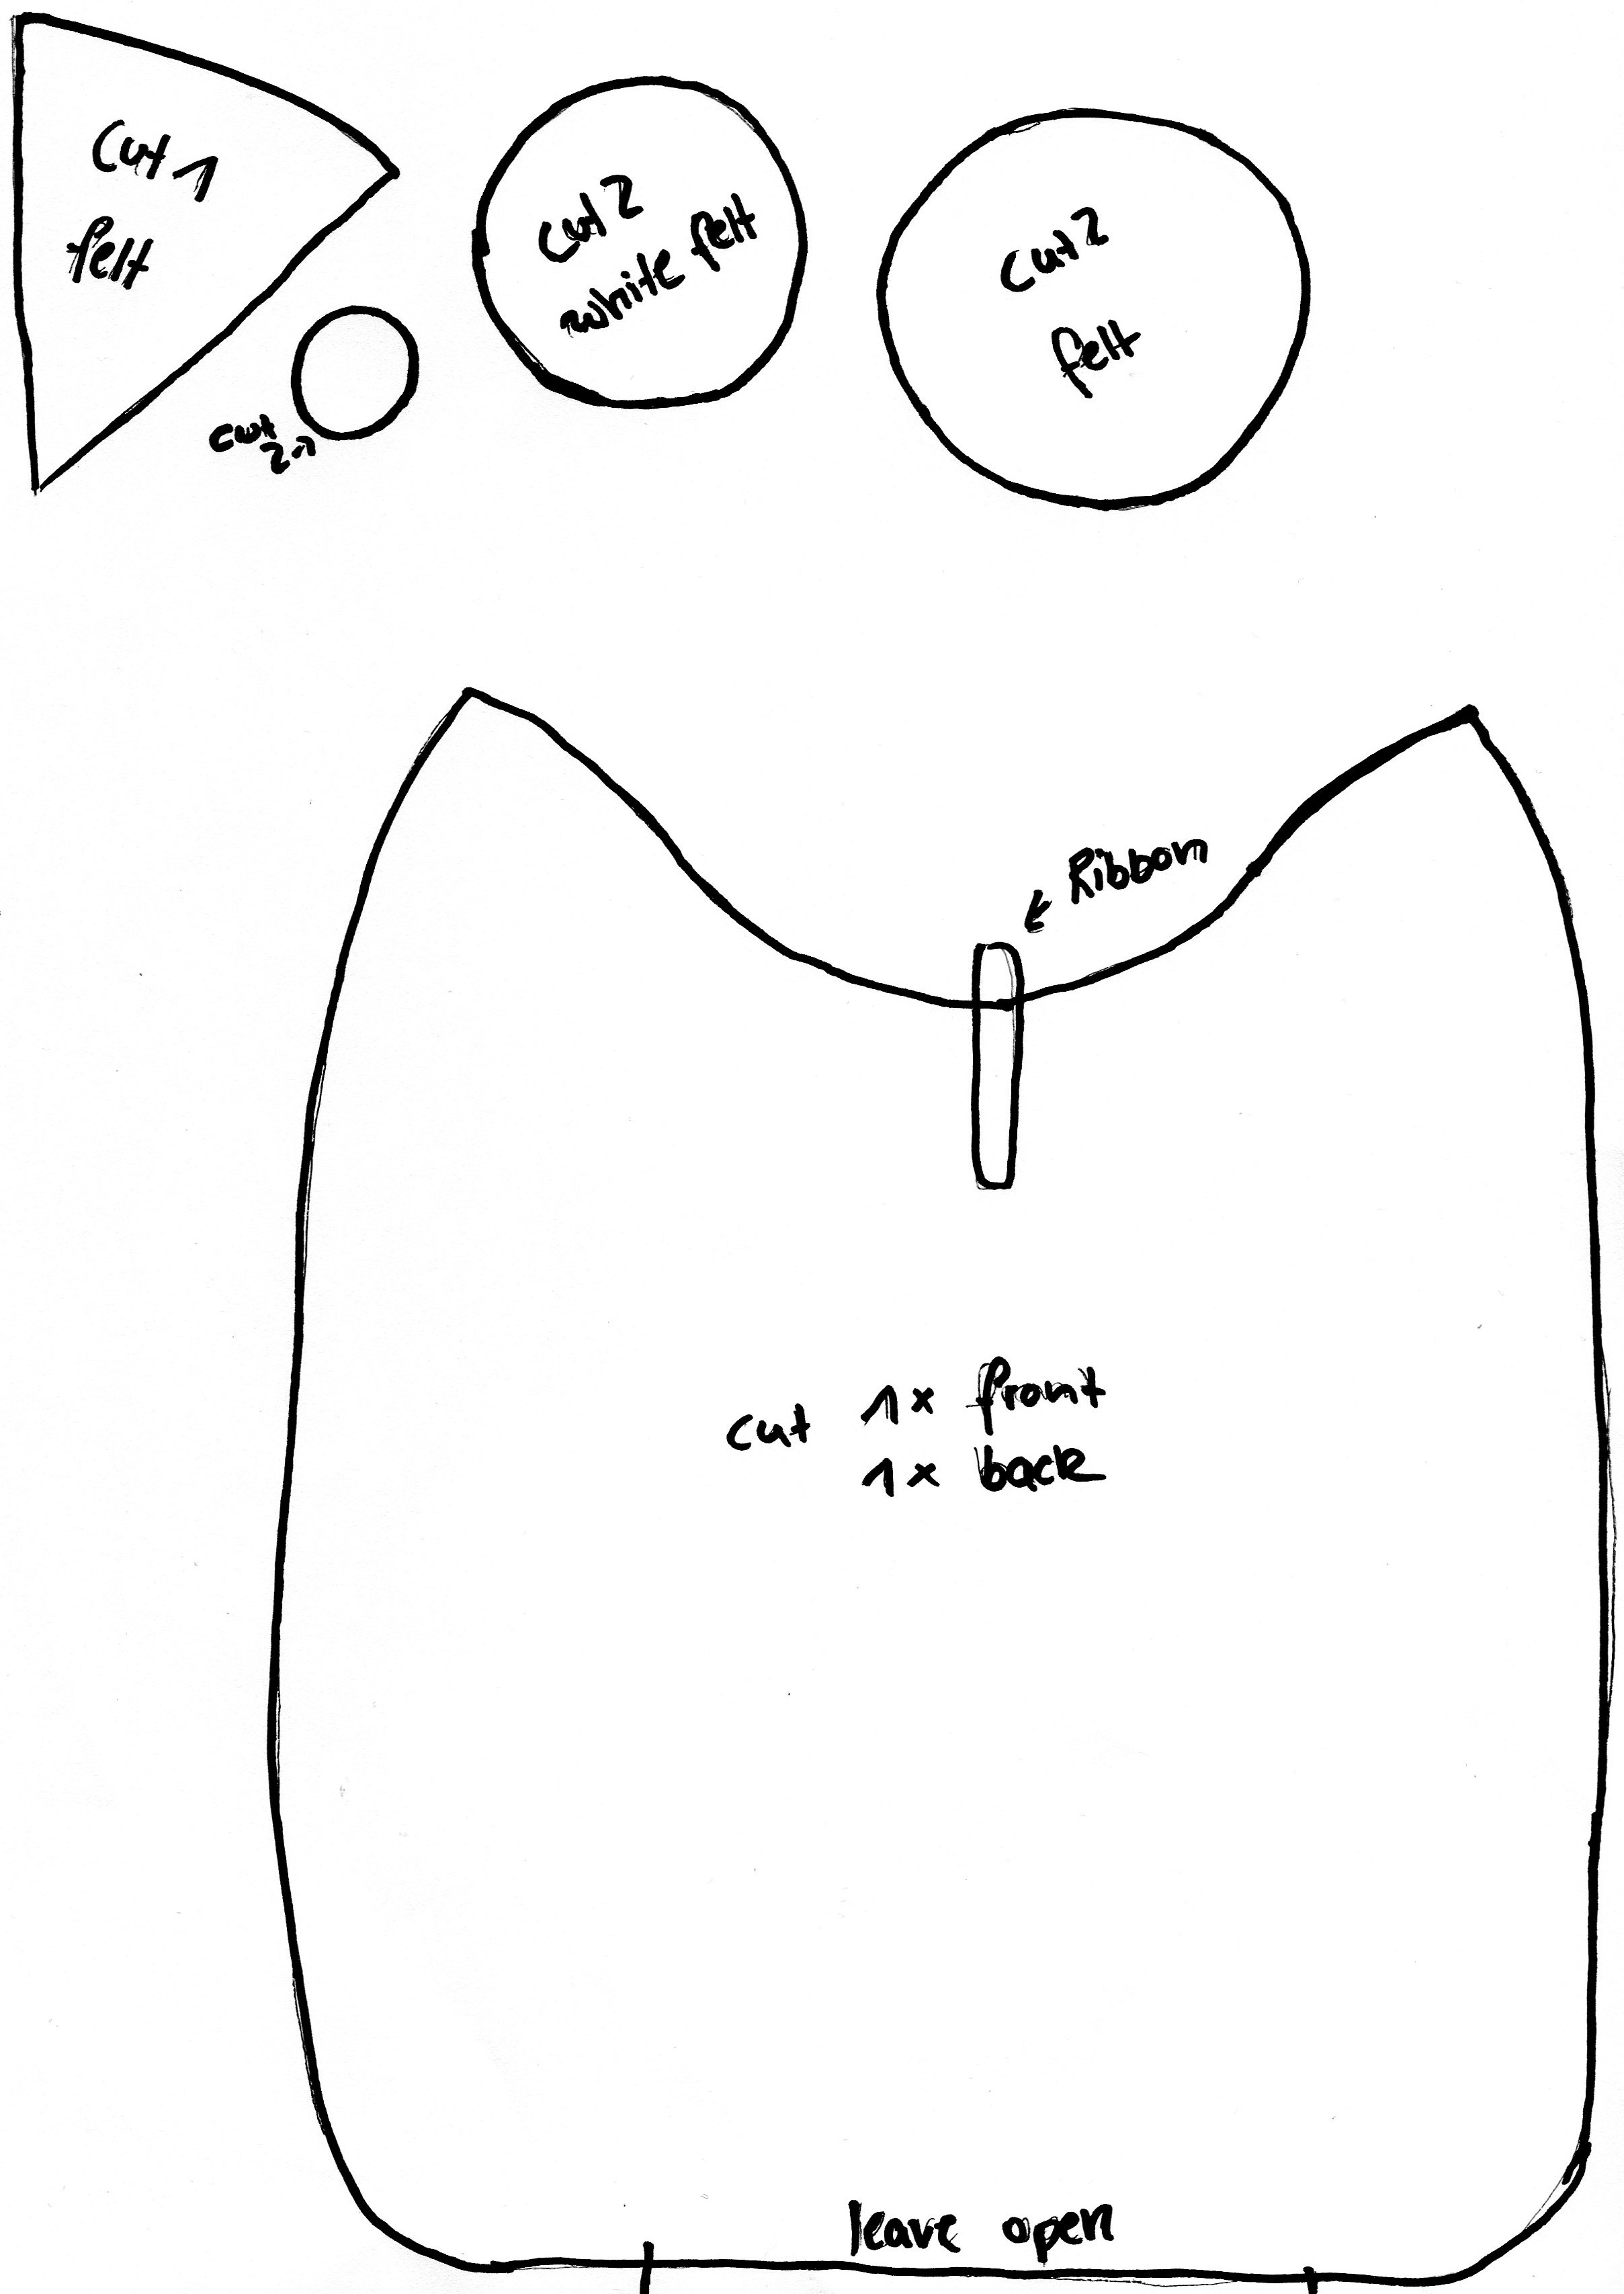
– pattern ( download here for free and here is page 2)
How to:
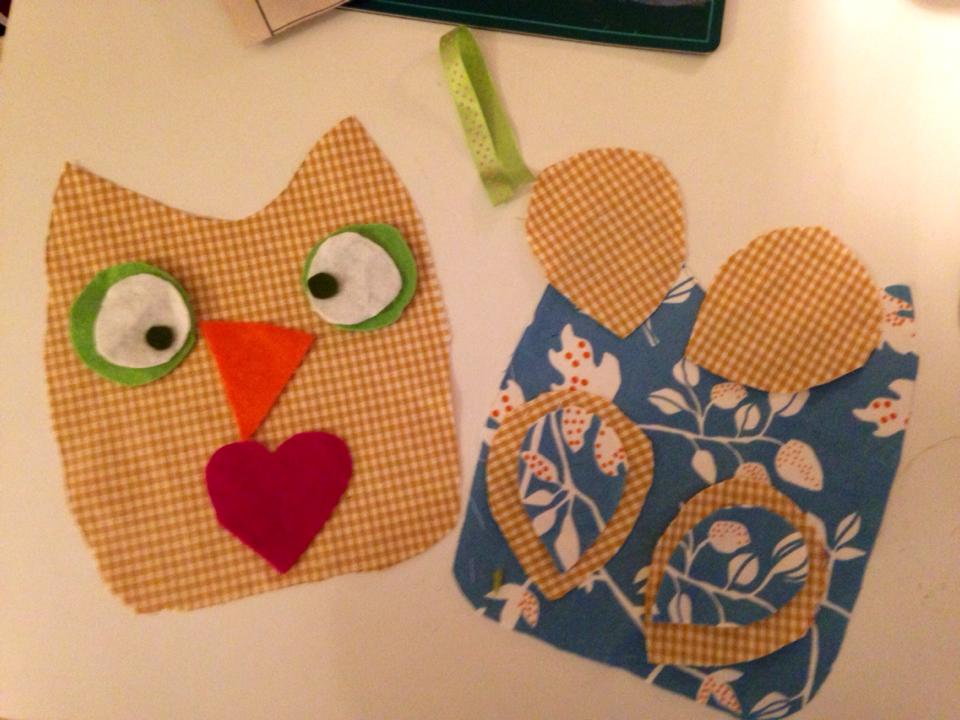
Cut all the pieces out of the fabric you chose. I chose the yellow for the front and the blue for the backside of my owl.
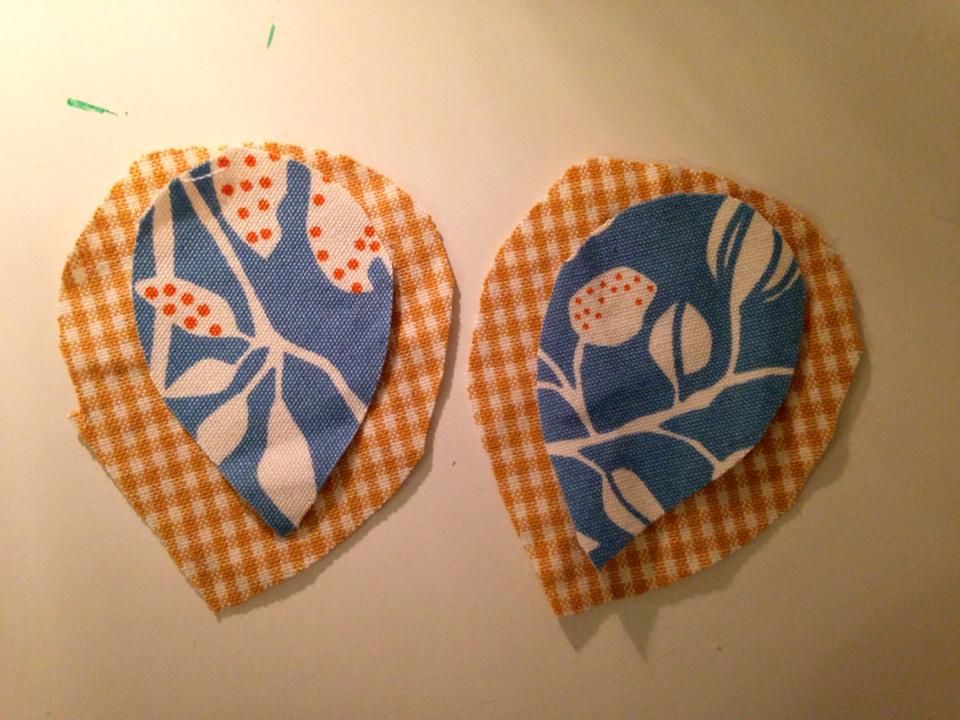
First we sew the small winglets onto the main wing with a narrow zigzag along the edge, to pretend it from fraying out. Sew left side onto right side of the fabric. Like this :
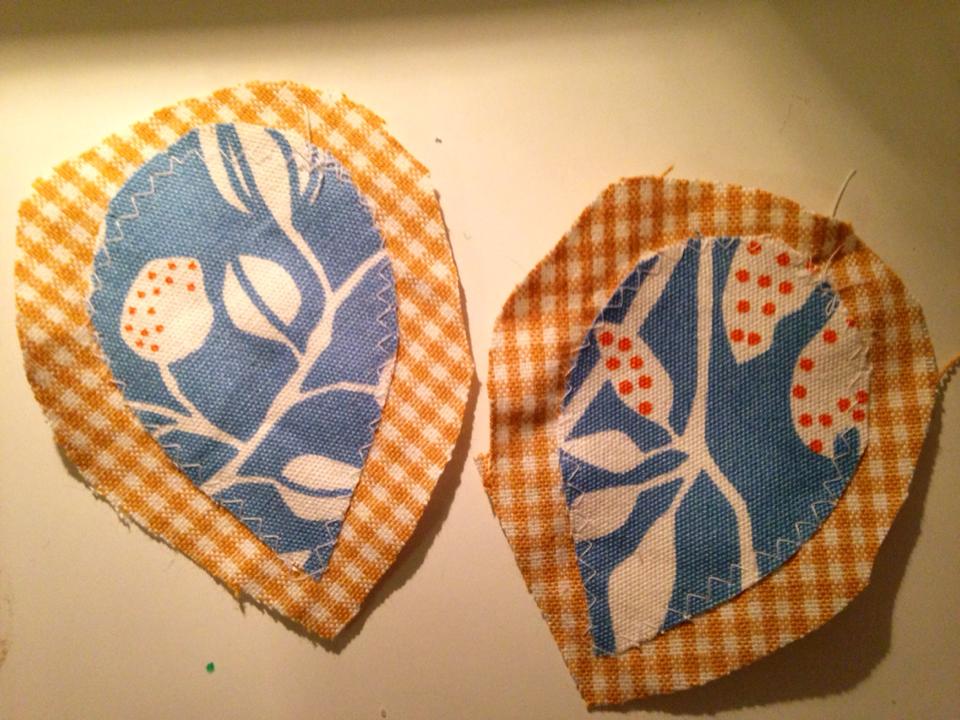
Once you’ve got that, take the other (in my case yellow) wing piece and put the right sides together. Sew with a half cm sewing allowance, leaving a 2 cm gap for turning. ALWAYS backstich

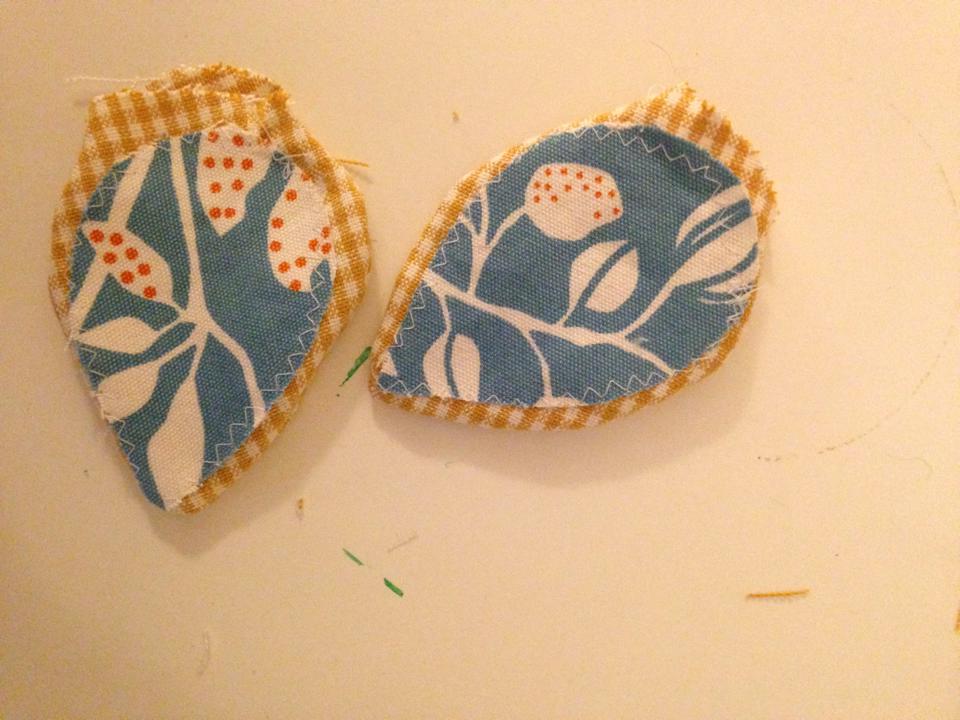
Turn inside out. Tada!, our wings are done. If you want you can fill them at this point with the crinkle paper.
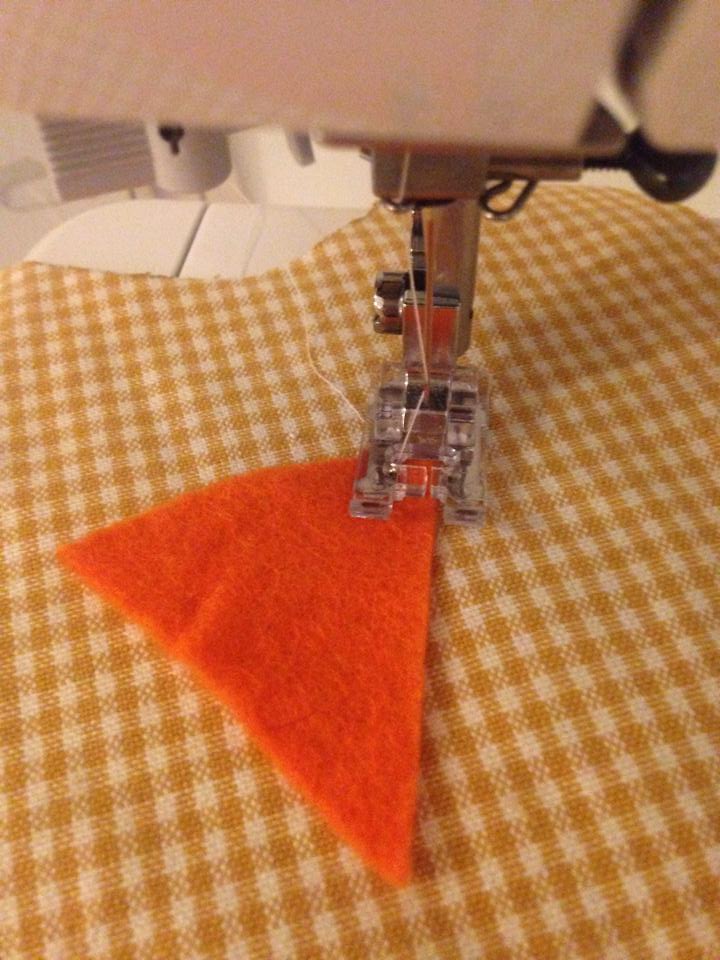
Next step is the face. I think that’s one of the most fun parts.Deciding which colours the little face will have. You don’t need to be super tidy with cutting the eyes in the same size and positioning everything symmetrical. I think a bit of uneveness gives the owl a quirky look and more character. A good thing to use at this point is an applice foot. Its usually see through plastic ,so it allows you to exactly see where you are sewing. My machine came with one like this.
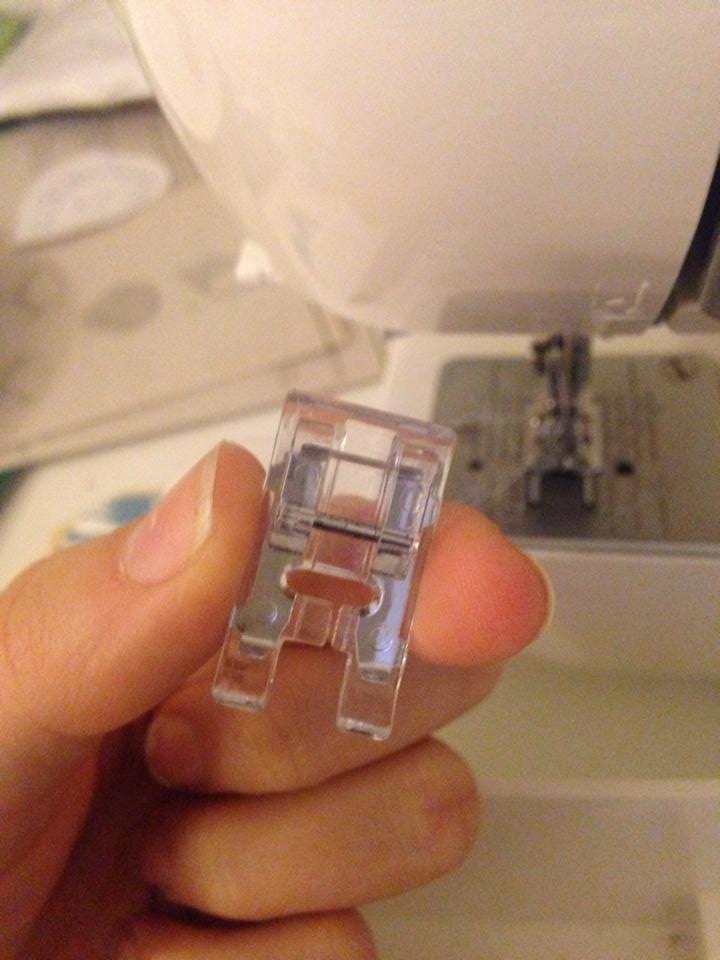
Pop that on and sew first along the edge of the beak . As close as you dare 🙂
 Then the eyes
.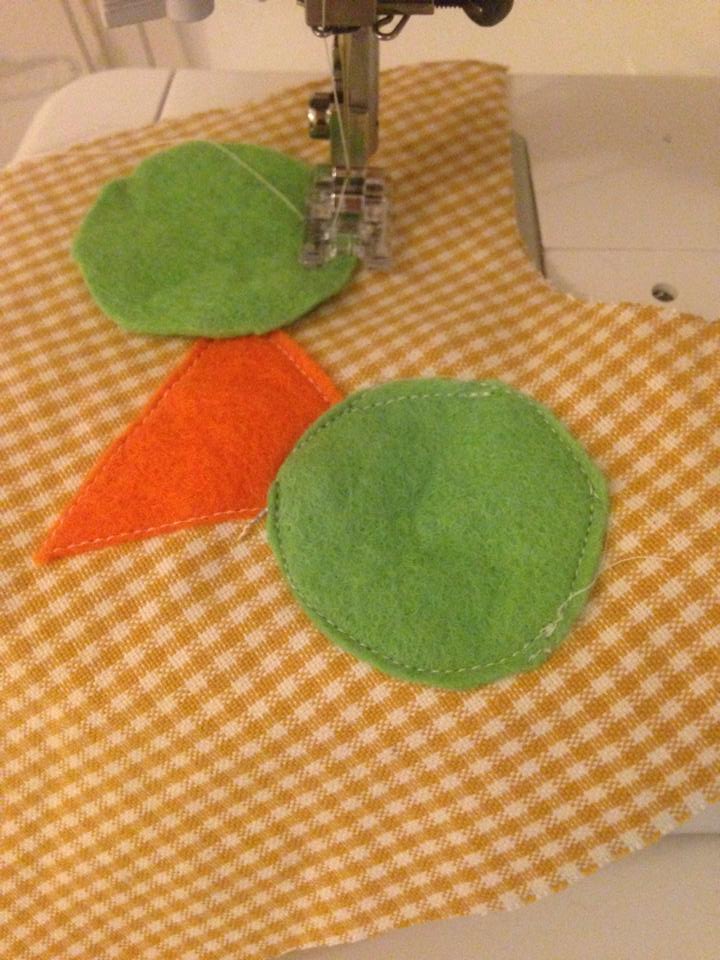 Do the same thing with the middle circle.
If you want you can also use contrasting thread. I think that looks kinda neat too.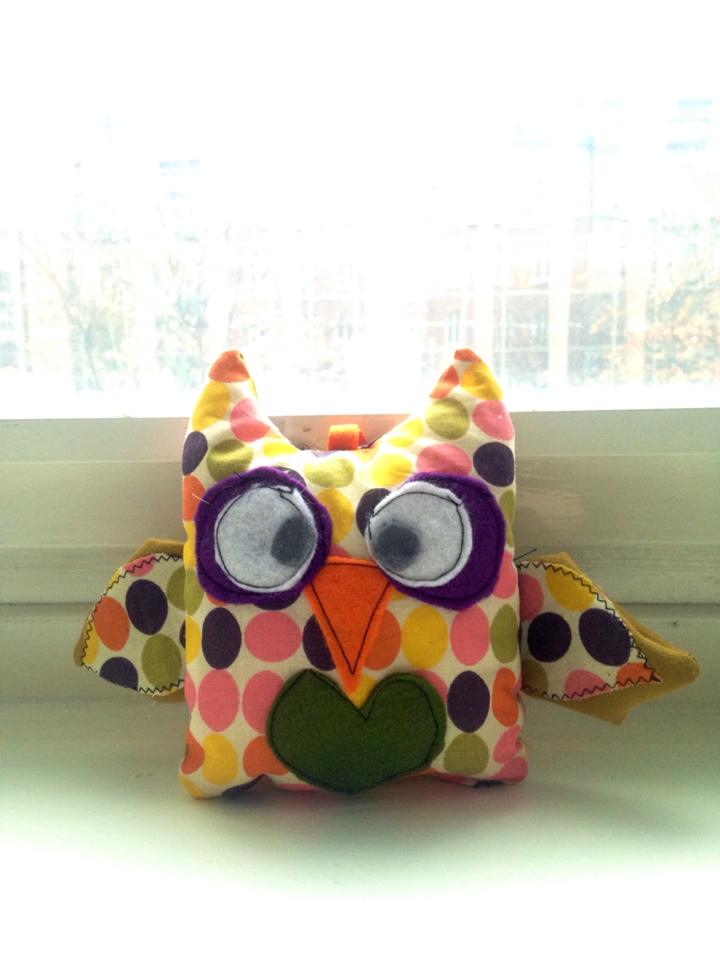
Now, if you want you can stitch the small circle in the middle with a little cross OR what i do is using fabric glue.
I personally think this one is great-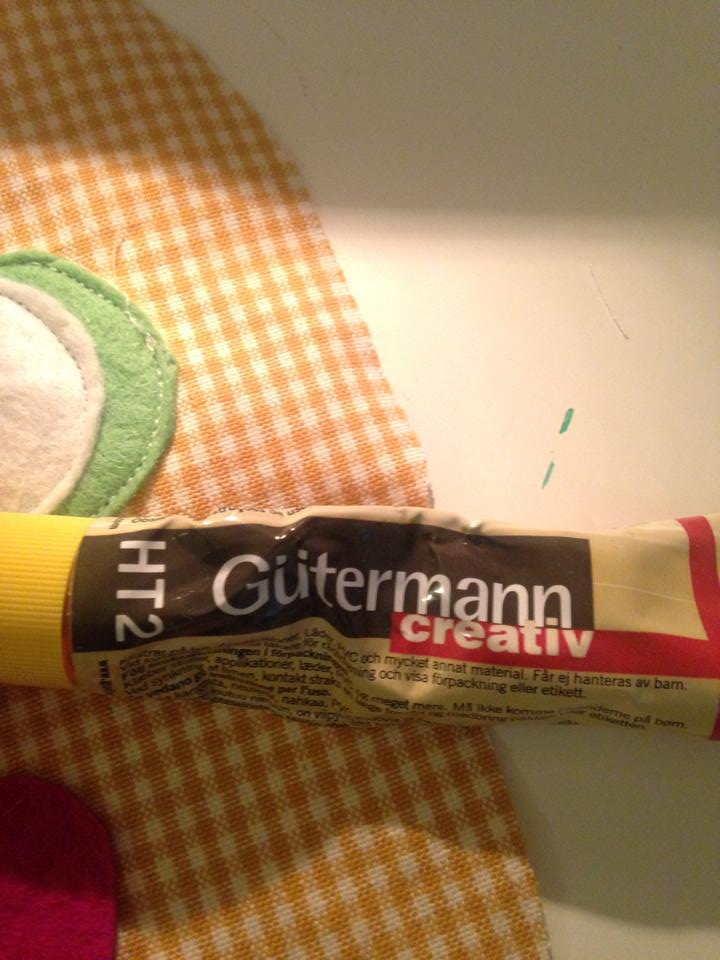
You can wash it by 40 degrees.
Sew on the heart in the same matter. Our owl should look something like this now: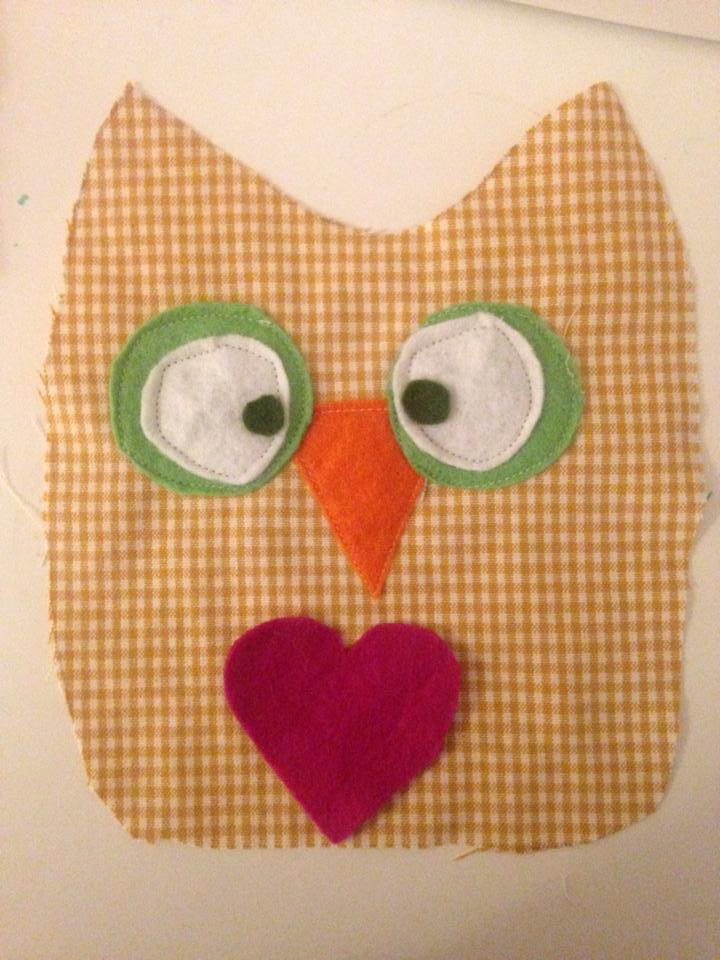
We can now resemble our pieces. You have to decide how you want the wings to look in the end. You can either sew them on flat or fold them together like this :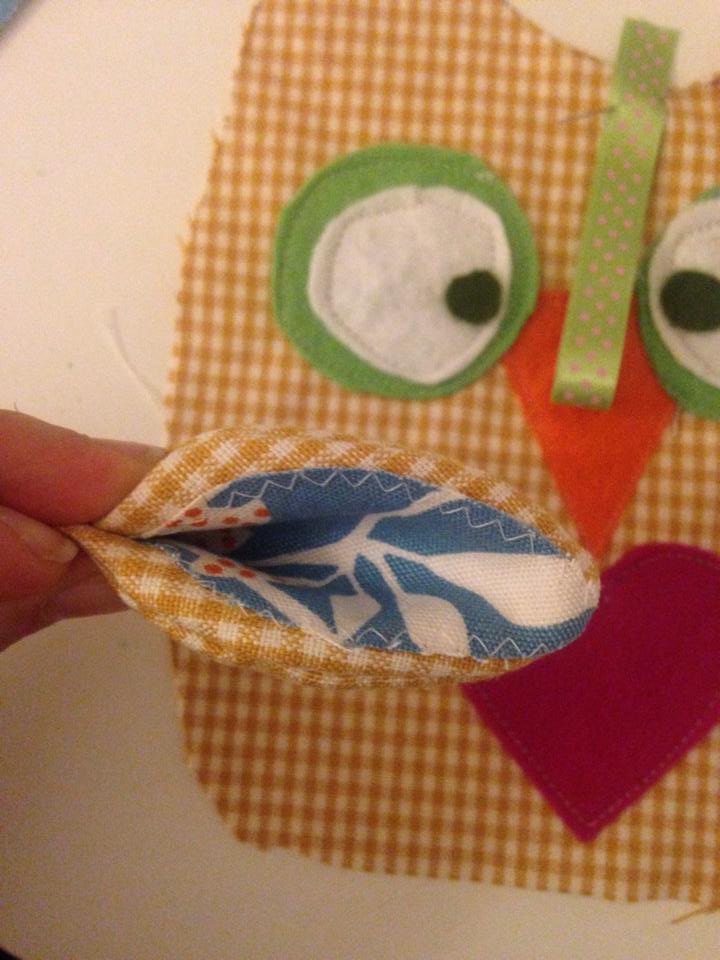
Put them right side facing down on the owl and secure with pins.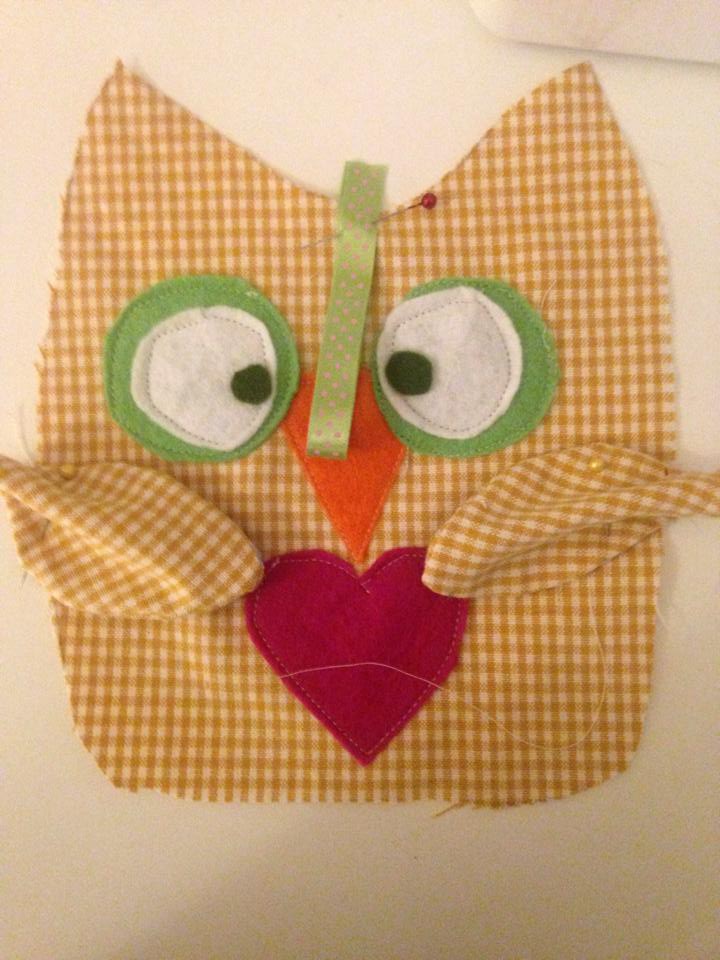
Fold the ribbon in the middle and put it on the owl where its marked on the pattern with the fold facing in.Pin.
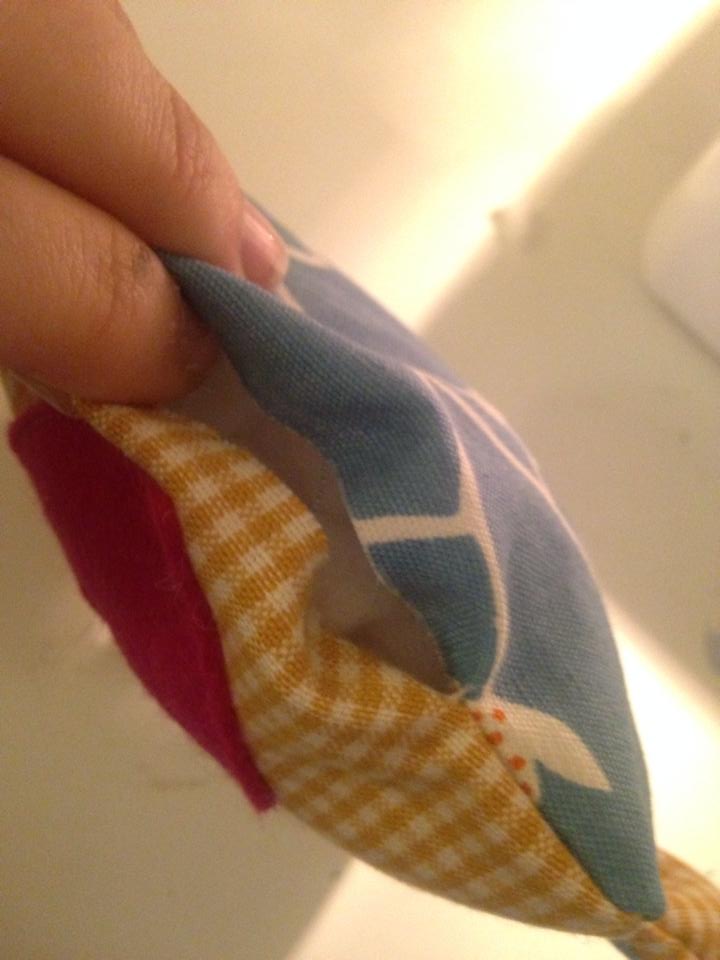
Next, lay backside of the owl onto front. Right sides together. Carefully take out pins from underneath and stick them through all layers. If you use two times heavy canvas and especially if you folded the wings – use a denim needle for the next step .
 Now its all pinned. Start sewing at the bottom edge on the left. Sewing allowance is 1 cm. That’s already included in the pattern. I do try and come down to about presser-foot-width once i come up to the ears.
Leave a gap to fill the owl as marked on pattern.
Clip the corner of the ears- that makes them nice and pointy! 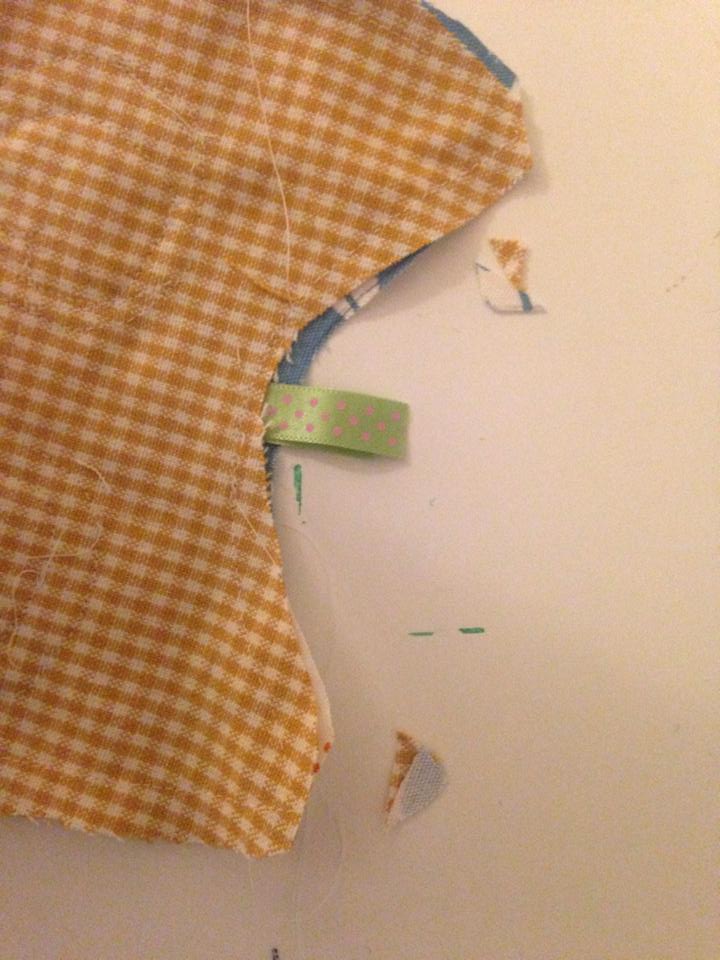
Now the most exciting part- turn the cutie inside out!
That’s how mine looks_ . Now we are almost done. Fill it to your preferred density.Then fold the openings in so they match the rest of the seam. Pin.
Sew as close to the edge as you can over both layers. Backstitch a few times
.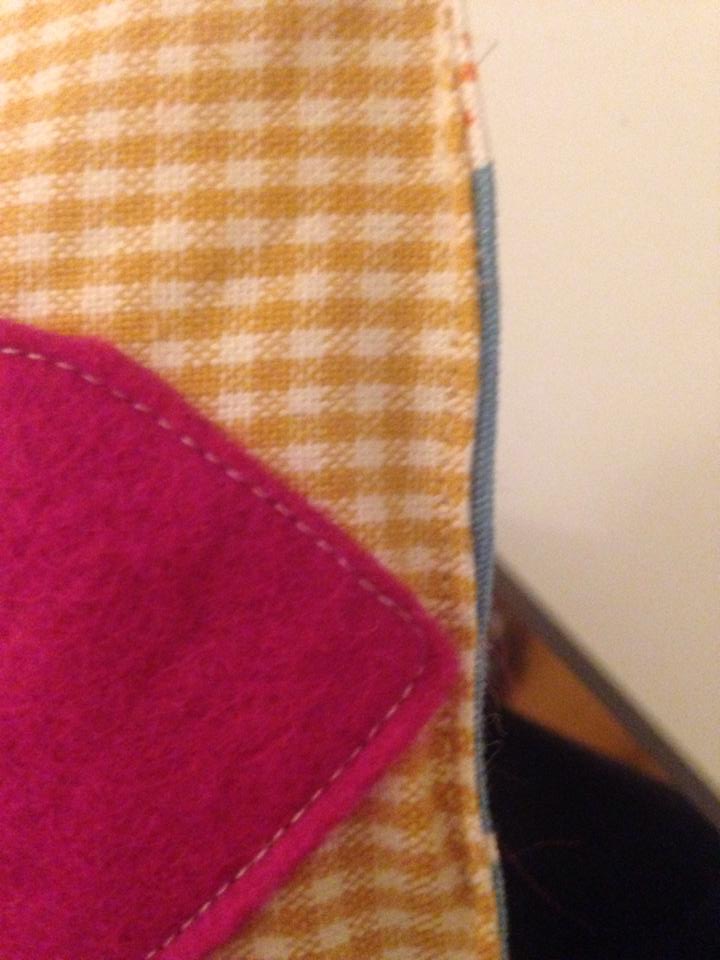
Your seam should look something like this. You can of course use a ladder or mattress- stitch. Im just rubbish at hand sewing !
DONE! HURRAY!
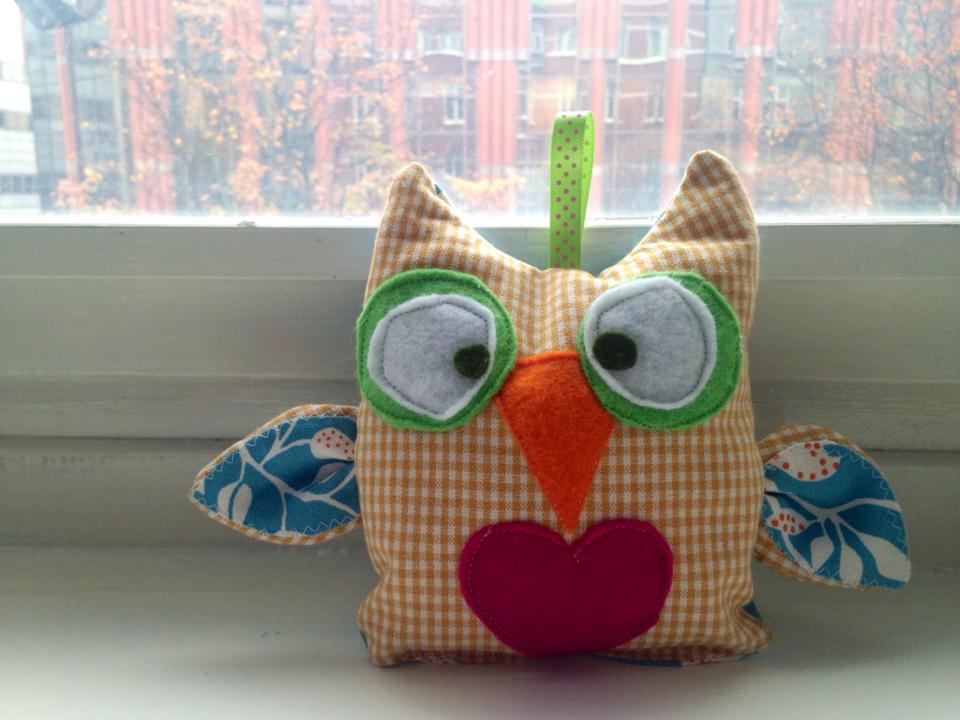 And there he is.
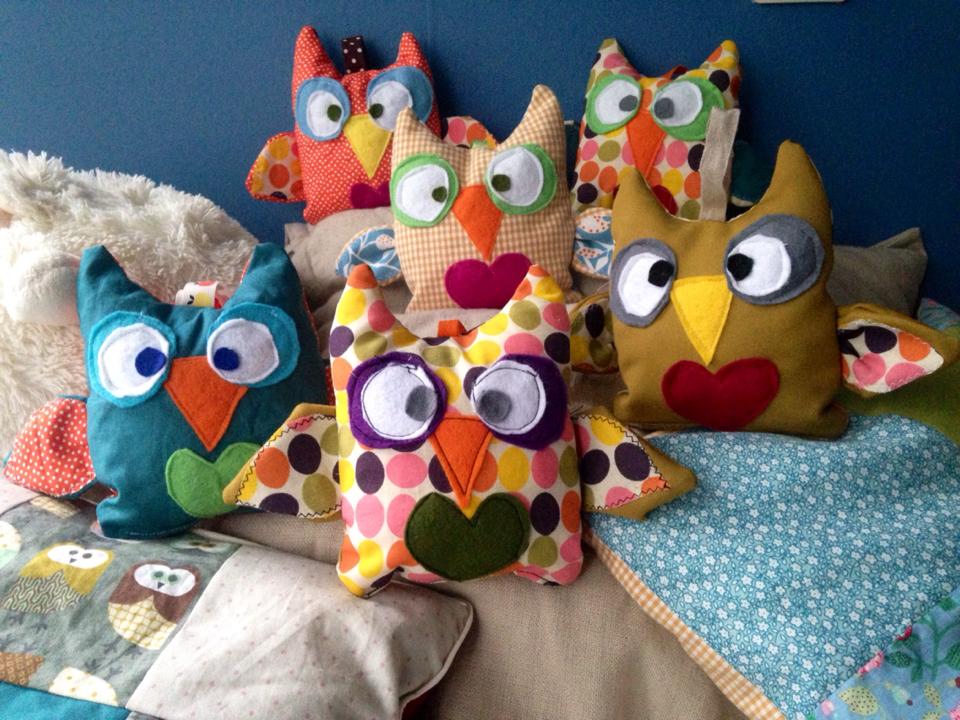 Hanging out with his owl-buddies.
Wasn’t so difficult was it? I think these make great little presents or nursery decor.
I would be delighted if you share your creations with me! Please put some photos in the comment section 🙂
Have a great day !

Such a nice post about DIY! You are so creative, love these owls a lot.
LikeLike
Thank you! I’m fairly diy obsessed 🙂
LikeLiked by 1 person